If you love nails that sparkle a little, a lot, or in a full “tiny disco on my fingertips” kind of way, rhinestone nail kits are probably already on your wishlist. And honestly? I fully support that. A cute gem nail moment can make even the simplest manicure feel extra, playful, and way more glam without needing salon-level magic.
The best part is that DIY gem nails are actually very doable at home when you have the right little kit. But if you have ever gone searching for the best rhinestone nail kits for DIY gem nails, you already know the options can get chaotic fast. Some kits have gorgeous stones but weird tools. Some have a million gems but not much variety in size. Some look cute in the photos and then show up feeling like tiny craft supplies for a dollhouse emergency. Very hit or miss.
This guide is here to make the whole thing feel way less overwhelming. We’re going to talk about what makes a rhinestone nail kit worth buying, what beginners should look for, what tools help the most, how to make gem nails last longer, what types of kits are best for different nail looks, and how to build cute little DIY rhinestone manicures without turning your nail desk into a sparkly crisis.
Cute little essentials for DIY gem nail lovers
If you want a rhinestone nail setup that feels easier, prettier, and way less messy, these are the kinds of basics worth looking at first:
- Rhinestone nail kits with mixed sizes and pickup tools for easy DIY gem designs
- Rhinestone glue gels for better hold when you want gems to actually stay put
- UV LED nail lamps for curing gem glue gels and finishing details cleanly
- Wax pickup pens for placing tiny stones without losing your mind
- Nail art brush sets for cleaner glue placement and more detailed gem layouts
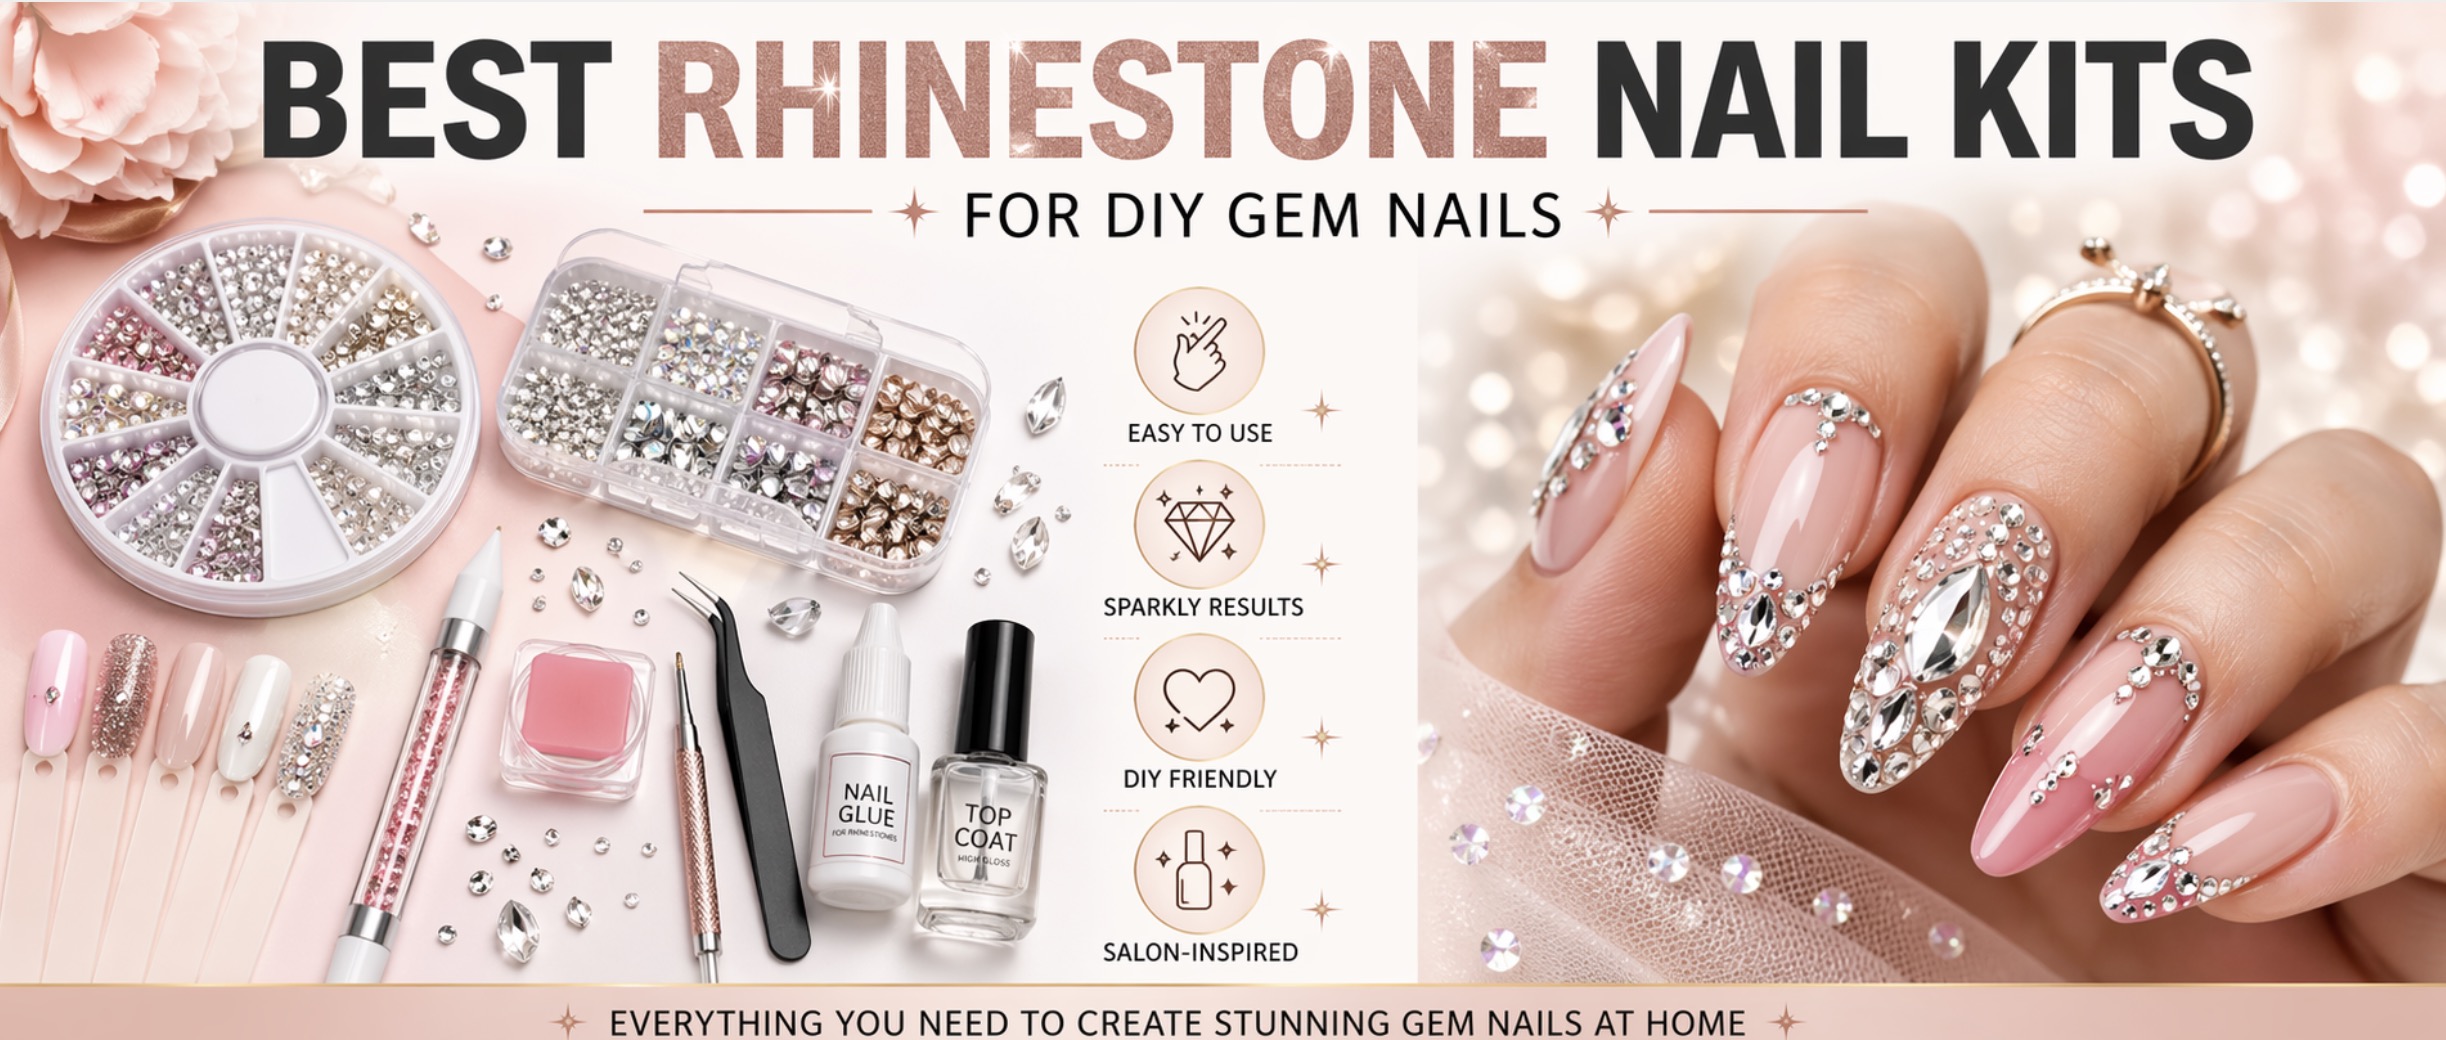
Why Rhinestone Nail Kits Are So Fun for DIY Nails
Rhinestone nail kits are one of the easiest ways to make your manicure feel more glamorous without needing super advanced nail art skills. Even one or two little gems on a nude manicure can look adorable. And if you are feeling extra? Full gem clusters, crystal cuticle lines, tiny bows made of stones, and sparkly accent nails are all right there waiting for you.
What makes kits especially helpful is that they usually bundle together the things you actually need, like:
- mixed rhinestone sizes
- different crystal colors or finishes
- pickup tools
- storage containers
- sometimes tweezers, wax pens, or brushes
That means you are not trying to build your little gem universe one chaotic missing piece at a time.

FANDAMEI Nail Charms, Nail Rhinestones Kit with 8 Boxes of Nail Gems, Bedazzling Kit for Nails, Colorful Clear Flatback Rhinestones, Charms Y2K for Nails, Multi Shape Nail Art Accessories for Crafts

BELLEBOOST Nail Art Rhinestone Kit, 15ml Rhinestone Gel Glue+Colorful Gems+Flatback Glass Crystal AB&Clear Gemstones with Pickup Tools for Bedazzling Nail and Face Makeup

Teenitor Nail Charms and Nail Art Tools Set, Nail Art Kit with 5 Boxes of 3D Nail Charms and Gems Rhinestones, 15 Pcs Nail Art Brushes, 5 Pcs Nail Dotting Tools, 2 Set of Nail Stand

Beetles Gel Polish Nail Glue with Nail Gems Set
What Makes a Rhinestone Nail Kit Worth Buying?
Not every kit is equally useful. Some are great for beginners, some are better for bigger 3D nail looks, and some just look prettier in the listing than they are in real life. Here is what matters most.
A Good Mix of Stone Sizes
The best kits usually include tiny, medium, and slightly larger stones so you can do simple accents, little clusters, or fuller gem designs without everything looking flat and repetitive.
Clear or Pretty Color Options
Clear crystal stones are the easiest place to start because they go with everything, but mixed kits with pinks, pearls, iridescent stones, or AB sparkle finishes can be so cute too.
Tools That Actually Help
A kit becomes way more beginner-friendly if it includes a wax pickup pen, tweezers, or a little tool for placement. Tiny rhinestones are cute until one launches itself into another dimension and you are crawling around your desk looking for it.
Organized Storage
Little divided containers make a huge difference. If all the stones arrive in a chaotic mixed bag, the whole DIY experience gets less magical very quickly.
Enough Variety Without Feeling Overwhelming
For beginners, too many choices can honestly get confusing. You want enough variety to be creative, but not so much that you spend 45 minutes staring at gems instead of actually doing your nails.
If you want to browse different styles, looking through rhinestone nail kits and AB rhinestones for nails can help you figure out whether you like a more classic crystal look or a more glowy rainbow-shift kind of sparkle.
Best Types of Rhinestone Nail Kits for Different Looks
For Simple Accent Nails
If you mostly want one or two stones near the cuticle, tiny crystal accents, or a minimal sparkle vibe, look for kits with small stones, clear crystals, and easy pickup tools.
For Full Glam Gem Nails
If you want nails that look extra, sparkly, and maybe just a little dramatic in the best way, look for mixed-size kits with larger stones, more shape variety, and stronger glue support.
For Cute Girly Nail Art
Pinks, pearls, iridescent stones, hearts, bows, and mixed pastel embellishments can be really adorable if you love sweeter, softer nail looks.
For Bridal or Elegant Nails
Clear crystals, pearl details, and tiny silver-toned stones are gorgeous for softer, elegant sets that still have sparkle without looking too heavy.
What Else You Need Besides the Rhinestones
Rhinestones are obviously the stars of the show, but a few other basics make the whole manicure work much better.
Rhinestone Glue or Glue Gel
If you want your gems to actually last, a proper rhinestone glue gel is such a good idea. A basic top coat alone is usually not enough for larger stones or longer wear.
A UV LED Lamp
If your gem glue needs curing, a reliable UV LED nail lamp matters a lot. It makes the whole process feel smoother and less random.
A Pickup Tool
A wax pickup pen makes placing tiny gems so much easier. Honestly, it is one of those little tools that sounds optional until you try doing detailed gem work without it.
A Fine Brush
A slim nail art brush set helps you place glue more neatly so the stones sit where you actually want them.
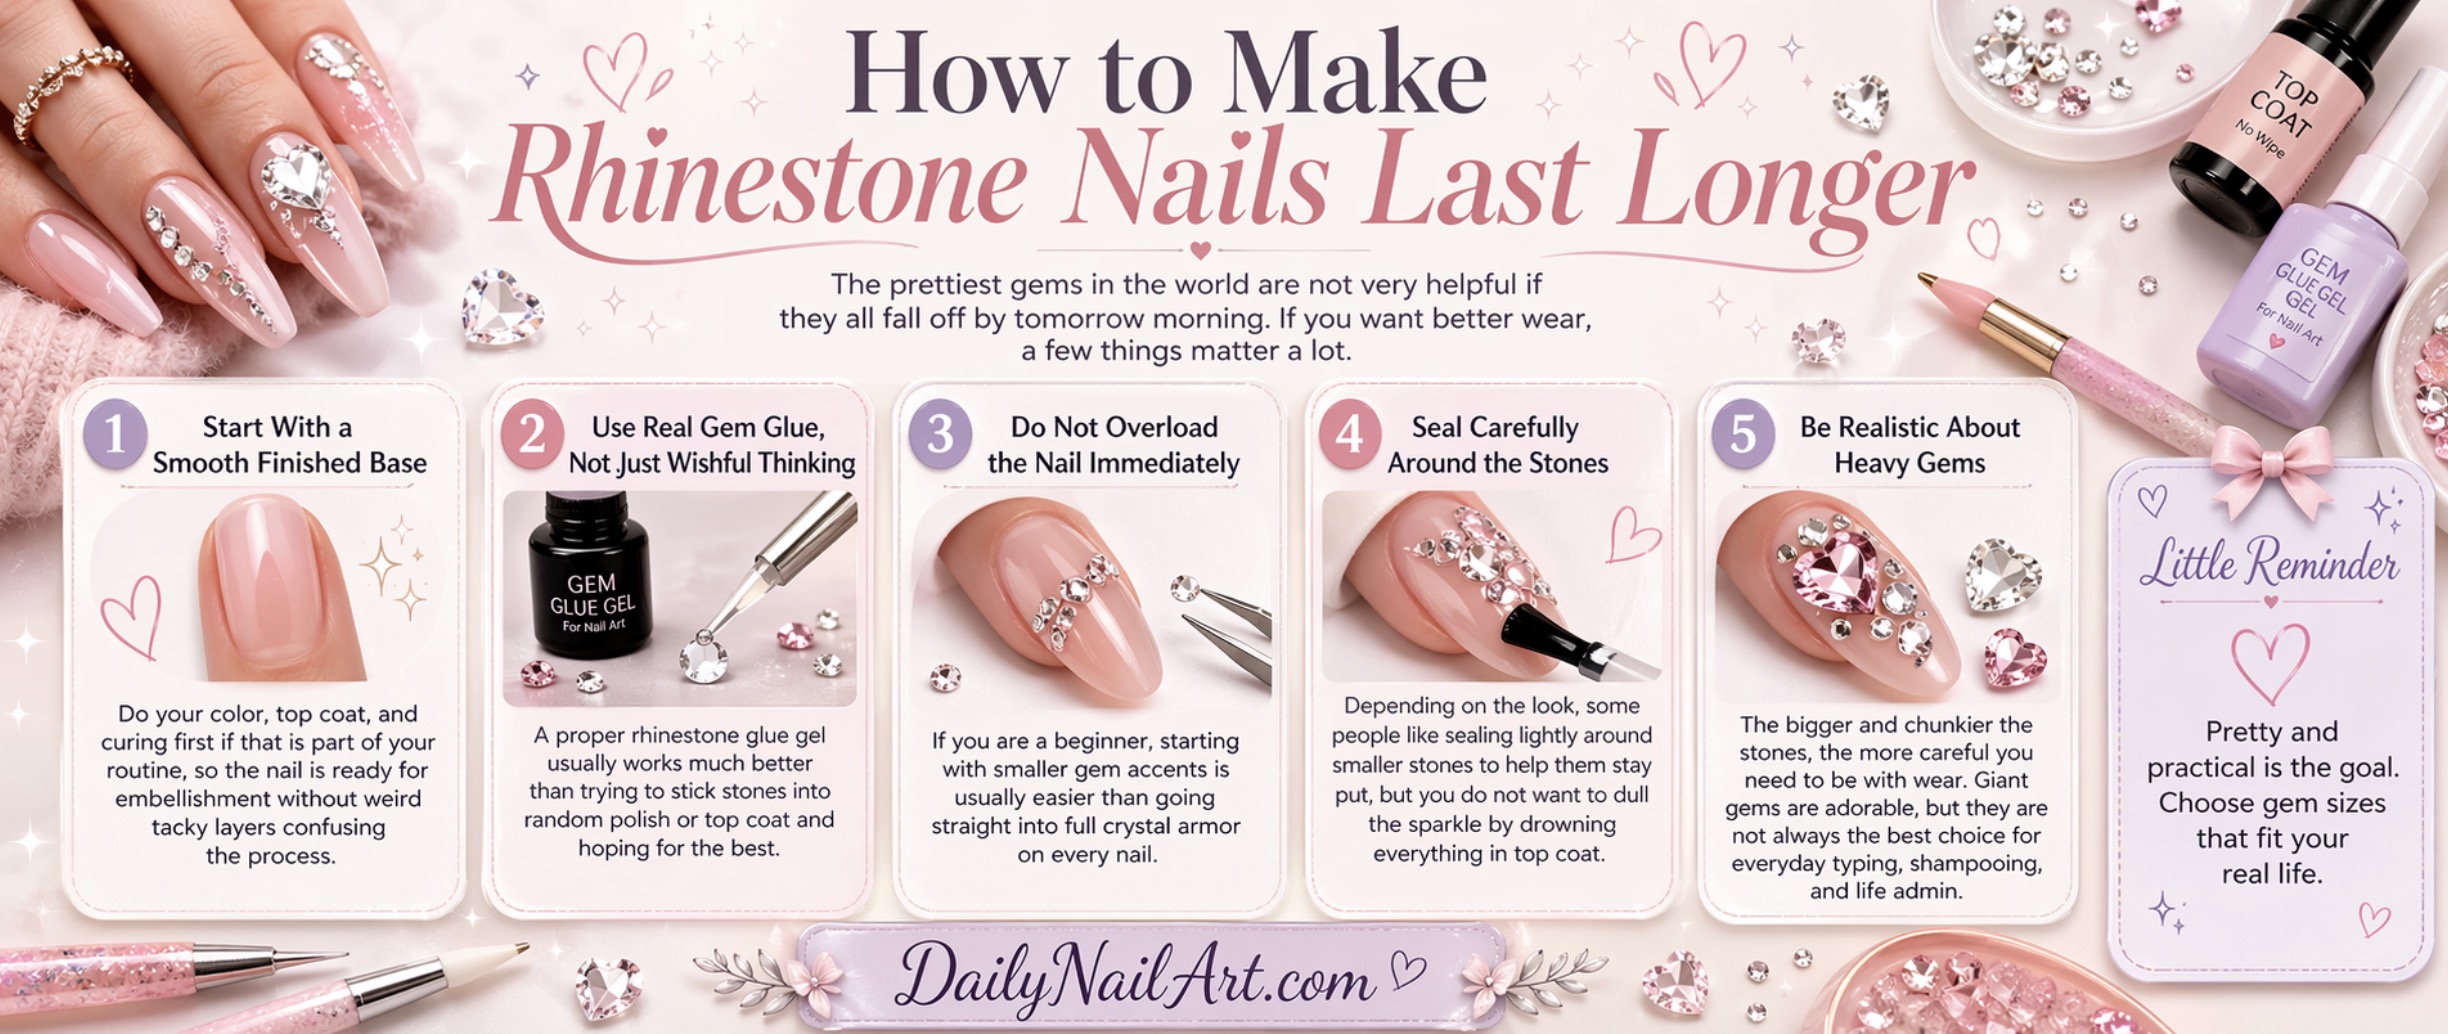
How to Make Rhinestone Nails Last Longer
The prettiest gems in the world are not very helpful if they all fall off by tomorrow morning. If you want better wear, a few things matter a lot.
Start With a Smooth Finished Base
Do your color, top coat, and curing first if that is part of your routine, so the nail is ready for embellishment without weird tacky layers confusing the process.
Use Real Gem Glue, Not Just Wishful Thinking
A proper rhinestone glue gel usually works much better than trying to stick stones into random polish or top coat and hoping for the best.
Do Not Overload the Nail Immediately
If you are a beginner, starting with smaller gem accents is usually easier than going straight into full crystal armor on every nail.
Seal Carefully Around the Stones
Depending on the look, some people like sealing lightly around smaller stones to help them stay put, but you do not want to dull the sparkle by drowning everything in top coat.
Be Realistic About Heavy Gems
The bigger and chunkier the stones, the more careful you need to be with wear. Giant gems are adorable, but they are not always the best choice for everyday typing, shampooing, and life admin.
Are Rhinestone Nail Kits Good for Beginners?
Yes, actually. Rhinestone kits can be super beginner-friendly, especially if you keep your first designs simple. Tiny crystal accents, cuticle-line stones, and one-gem accent nails are all very doable even if you are new to nail art.
The easiest beginner path is usually:
- start with clear or small stones
- use a wax pen or pickup tool
- practice on one or two accent nails first
- avoid giant gem clusters on your first try
You do not need to build a full crystal chandelier on your ring finger immediately. Baby sparkle steps are still very cute.
What Shapes and Styles Are Worth Trying First?
If you are new to DIY gem nails, these are some easy little looks that usually turn out cute without too much stress:
- a single stone near the cuticle
- a tiny cluster on one accent nail
- a crystal line along one side of the nail
- pearls mixed with small crystals
- a simple bow or heart made from tiny stones
Once you feel more confident, then you can absolutely get more dramatic and start doing fuller gem patterns, layered looks, or 3D art moments.
What Else Can Make DIY Gem Nails Look Better?
A few extra basics can really elevate the whole look:
- a glossy gel base underneath
- pretty nude or milky pink polish
- chrome or shimmer backgrounds for extra sparkle
- good lighting while you work
- clean cuticles and smooth nail shaping
If you want the gem nails to really pop, pairing them with a glossy base from a gel base and top coat set or a soft nude and pink gel polish set can make the whole design look way more polished.
Common Mistakes That Make Rhinestone Nails Look Messy
Using Too Much Glue
A giant puddle of glue around the gems is not the look. You want enough to hold the stones, not enough to create a little clear swamp around them.
Placing Stones Randomly Without a Plan
Even a cute chaotic style looks better when it feels intentional. Tiny layout planning really helps.
Starting Too Big Too Fast
Huge gems are fun, but they are harder to place neatly and wear comfortably if you are still learning.
Skipping the Right Tools
A wax pen and fine brush honestly make the process so much less frustrating.
How to Choose the Best Kit for Your Style
If You Love Soft Girly Nails
Look for pearls, pink crystals, iridescent stones, and smaller embellishments that work beautifully on blush or nude manicures.
If You Love Full Glam Nails
Choose kits with more size variety, stronger sparkle, and maybe mixed shapes for bigger statement nails.
If You Want Easy Everyday Sparkle
Go for clear crystals and tiny sizes that work as accent details instead of full coverage.
If You Want Bridal or Occasion Nails
Look for clear stones, pearl mixes, and elegant little shapes that add sparkle without feeling too loud.
Frequently Asked Questions
What should a good rhinestone nail kit include?
A good kit usually includes mixed-size stones, storage compartments, and helpful tools like a wax pickup pen or tweezers for easier placement.
Do I need special glue for rhinestone nails?
Yes, usually. A proper rhinestone glue gel helps gems stay on much better than trying to use regular top coat alone.
Are rhinestone nail kits good for beginners?
Yes. They can be very beginner-friendly, especially if you start with small accent stones and simple designs instead of huge gem clusters right away.
How do I make rhinestones stay on my nails longer?
Use proper gem glue, place the stones carefully, start with a smooth nail base, and avoid overly heavy gem layouts if you want easier everyday wear.
What is the easiest rhinestone nail look for beginners?
A single crystal near the cuticle, a tiny cluster on one accent nail, or a simple crystal line along the side of the nail are all easy and really cute beginner options.
Final Thoughts
The best rhinestone nail kits for DIY gem nails are the ones that give you pretty stone variety, useful tools, and an easier path to sparkle without making the whole process feel like a tiny crystal emergency. You want stones that actually look cute on the nail, a way to place them neatly, and glue that helps them last longer than one dramatic hand wash.
If you are new to gem nails, keep it simple at first. Small crystal accents, soft girly shapes, and clean placement can look incredibly cute without needing a full-on maximalist masterpiece every time.
Because honestly, there is something very satisfying about finishing a DIY manicure, tilting your hand in the light, and seeing those little gems sparkle back at you like your nails just got promoted into their glam era.