
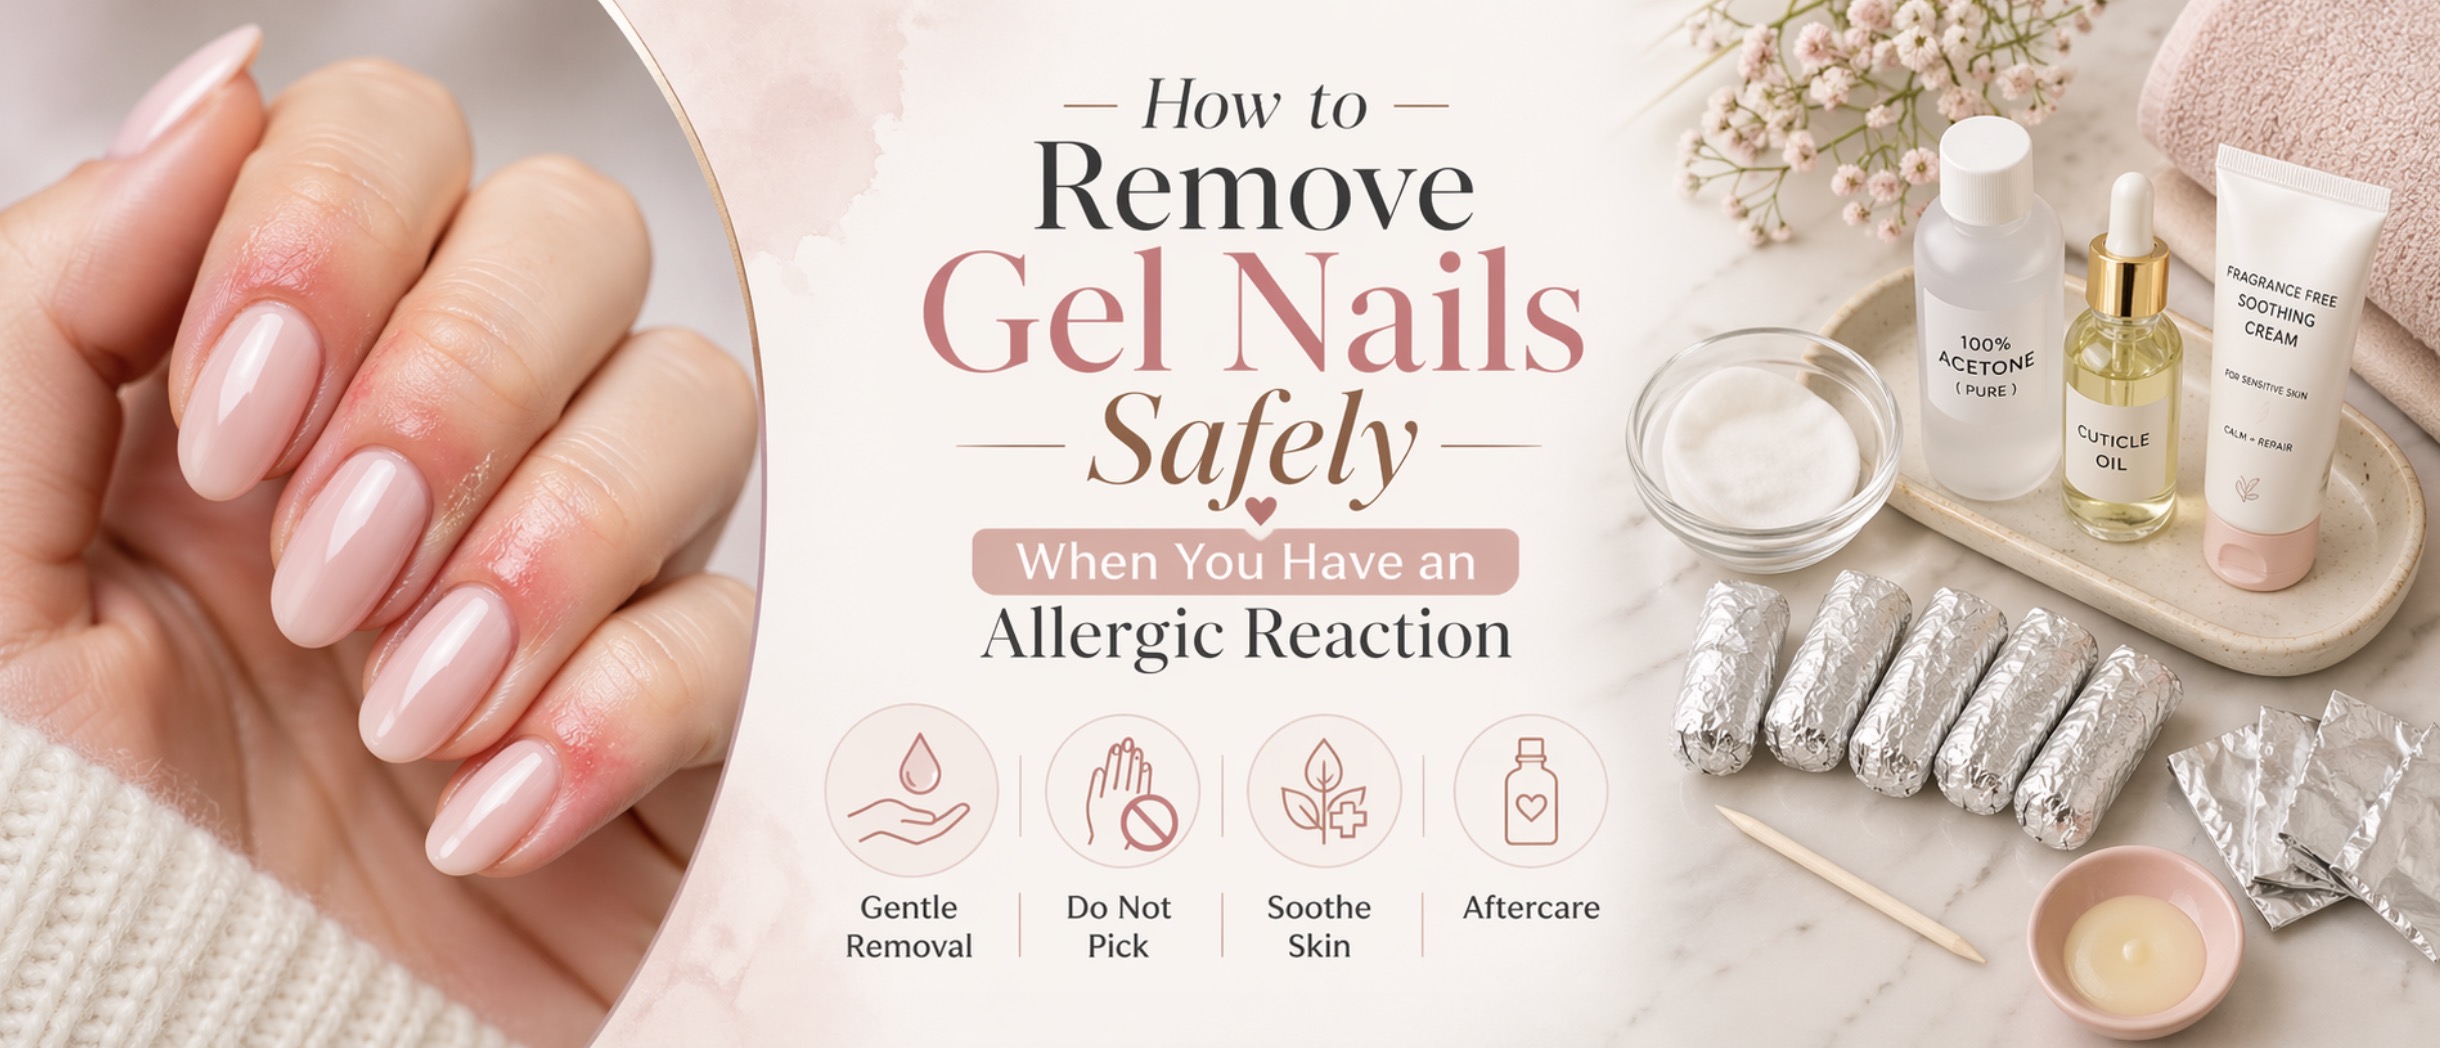
When your fingers are itchy, swollen, red, burning, peeling, or blistery after gel nails, the first instinct might be to panic-remove everything immediately. Totally understandable. A gel nail allergic reaction can feel scary, uncomfortable, and very much not the cute manicure moment you planned.
But here is the important part, babe: removing gel nails during a reaction needs to be done carefully. Picking, ripping, over-filing, or aggressively scraping can damage your natural nails and make irritated skin feel even worse. The goal is to reduce exposure to the product while protecting your nail plate and the delicate skin around it.
This guide explains how to remove gel nails safely when you have an allergic reaction, what symptoms mean you should stop and get medical help, what supplies can make removal easier, and how to care for your nails afterward so your hands can have a calm, healthy little recovery era.
Gentle removal essentials for angry gel nails
If your skin is reacting, keep removal simple, slow, and gentle. These are helpful categories to look at before you start:
- Gel nail removal kits for a more organized soak-off routine
- Soak-off nail clips to hold cotton in place without messy foil
- 100% acetone nail polish remover for soak-off gel removal
- Gentle nail buffers for lightly breaking the top coat seal
- Fragrance-free hand creams for sensitive skin after removal
First: Is It Really an Allergic Reaction?
A gel nail reaction can look a little different from person to person. Some people get itchy fingertips. Some get swollen cuticles. Some get tiny blisters, peeling skin, burning, tenderness, or a rash that shows up around the nails. In some cases, symptoms can appear on the eyelids, face, or neck because nail allergens can transfer when you touch those areas.
Common gel nail allergy symptoms may include:
- itching around the cuticles or fingertips
- redness around the nail folds
- swollen fingertips or puffy cuticles
- burning, stinging, or tight skin
- dry, flaky, cracked, or peeling skin
- tiny bumps or fluid-filled blisters
- nail lifting or separation
- rash on the eyelids, face, neck, or hands
That said, allergic reactions, irritation, infection, and nail trauma can sometimes look similar. If you have pus, spreading redness, fever, severe pain, warmth, or a nail that looks infected, do not treat it like a simple gel allergy. Get medical help.
Beetles HEMA Free Builder Gel with No Wipe Top Coat Gel Polish and Base Coat Set for Nails Shine Finish and Long Lasting Upgraded Safe Low-Sensitivity Formula Gifts for Women
Love easy Hema Free Builder Gel - Hypoallergenic Strong Base Coat | Long-Lasting Adhesion (30+ Days) for Professional Nails Gift for Women
Beetles Builder Gel Nails Kit HEMA Free & Handheld Nail Lamp, 8 in 1 Clear Natural Nude Building Gel with Base Top Coat, for Thickening Strengthening Shaping Apex, for Beginner DIY Salon at Home Gifts

DERMFREE Toenail Treatment,Gentle Formula, Effectively Improves Nails for a More Beautiful Appearance(1pcs)
When You Should Not Remove Gel Nails at Home
Home removal is not always the safest choice. If your reaction is severe or your skin is broken, aggressive soaking and handling can make things worse. Sometimes the best move is to contact a dermatologist, urgent care provider, or a skilled nail professional who can help safely remove product without causing extra damage.
Do not remove gel nails at home if you have:
- severe swelling around the fingers
- intense pain or throbbing
- pus, drainage, or a bad odor
- spreading redness or heat
- deep cracks, open wounds, or bleeding skin
- blisters that are large, painful, or widespread
- eye swelling, facial swelling, or trouble breathing
- nails that are lifting from the nail bed
If symptoms involve breathing, facial swelling, or rapid swelling, treat it as urgent. A nail article is not the place to play guessing games with serious allergic symptoms.
Why You Should Remove Gel Carefully During a Reaction
If your skin is reacting to gel, the goal is usually to stop exposure to the suspected trigger. Gel products can contain acrylates or methacrylates, and uncured or partially cured product can be especially irritating or allergenic for some people. Removing the product may help reduce continued contact, but the removal process itself can also irritate skin if done roughly.
That is why gentle removal matters. Picking off gel can pull up layers of your natural nail. Over-filing can thin the nail plate. Scraping too hard can cause soreness and create tiny injuries. Acetone can dry out already irritated skin. So the vibe is: calm, controlled, no panic-peeling.
What You Need for Safe Gel Removal
Before you start, gather everything so you are not running around with half-soaked nails. A basic removal setup may include:
- 100% acetone
- cotton pads or cotton balls
- foil wraps, plastic wrap, or soak-off clips
- a gentle nail file or buffer
- a wooden cuticle stick or orange stick
- paper towels or a washable towel
- mild soap and water
- fragrance-free moisturizer
- cuticle oil, only if your skin is not open or blistered
You can browse gel nail removal kits with clips if you want the supplies bundled together. Clips can be easier than foil if your hands are itchy or tender, because they are reusable and less fiddly.
Step 1: Stop Using the Gel Products Immediately
If your fingers are reacting, do not add more gel, top coat, glue, builder gel, primer, or polish. Do not cure anything else under the lamp. Do not try to “seal” the reaction with more product. That can trap the problem and keep exposing your skin.
Put away the gel kit, close all bottles, and wash your hands gently. Avoid touching your eyes, face, or neck until your hands are clean. If product residue is involved, transfer to the eyelids can make symptoms show up away from the nails.
Step 2: Check Your Skin Before Soaking
Before using acetone, look closely at your skin. If the skin around your nails is raw, cracked open, bleeding, or blistered, acetone may sting badly and worsen irritation. In that case, it may be safer to call a professional or medical provider for advice before soaking.
If your symptoms are mild, like itching, slight redness, or early peeling, gentle removal may be reasonable. But listen to your skin. If acetone burns intensely, stop.
Step 3: Lightly Break the Top Coat Seal
Gel top coat is designed to be shiny and protective, so acetone needs help getting through it. Use a gentle file or buffer to lightly remove the shine from the top layer. The goal is not to file down to your natural nail. You are only roughing up the glossy surface so the acetone can do its job.
Use light pressure. If your nails are sore, go even slower. If filing dust bothers your skin, wipe it away gently and wash your hands before soaking. A 180/240 grit nail buffer can be useful for gentle surface work.
Step 4: Protect the Skin Around Your Nails
Acetone can be drying, especially on irritated skin. If your skin is not open or blistered, you can apply a thin layer of petroleum jelly or a thick fragrance-free balm around the nail folds before soaking. Avoid putting it on top of the gel nail itself because it can block acetone from reaching the product.
If your skin is broken, swollen, or blistered, skip this step and get medical advice instead. Applying random products over open skin can sting or cause more irritation.
Step 5: Soak With Acetone
Saturate small pieces of cotton with 100% acetone and place one on each gel nail. Secure with foil, plastic wrap, or soak-off clips. Many dermatology removal guides recommend acetone as the most effective option for gel polish removal, and keeping the acetone in contact with the nail helps soften the product.
Let the nails soak for about 10 to 15 minutes, then check one nail. The gel should look lifted, softened, wrinkly, or flaky. If it still feels firmly attached, rewrap and wait a little longer. Do not force it.
If you prefer clips over foil, look for soak-off nail clips for gel polish. They can make the process less messy and easier to manage at home.
Step 6: Gently Push Off Softened Gel
After soaking, use a wooden cuticle stick or orange stick to gently nudge softened gel off the nail. The keyword is gently. If the gel does not slide off with light pressure, it is not ready. Re-soak instead of scraping harder.
Do not use metal tools aggressively on irritated nails. Do not dig under lifted areas. Do not pry product away from the nail. Your natural nails are already having a stressful day, so we are treating them like delicate little princesses.
Step 7: Repeat Soaking Instead of Scraping
Some gel comes off in stages, especially if it was applied thickly or has multiple layers. That is normal. Reapply acetone-soaked cotton for another 5 to 10 minutes and try again gently.
If you are removing builder gel, hard gel, or a very thick overlay, acetone may not remove it fully. Hard gel usually needs careful filing by a professional. If you are not sure what product is on your nails, do not over-file at home. Book a professional removal or ask the salon what was used.
Step 8: Wash Hands Gently After Removal
Once the gel is off, wash your hands with mild soap and lukewarm water. Do not scrub. Pat dry with a clean towel, especially around the nail folds and under the free edge.
Your nails may look dry, rough, or a little sad after removal. That does not mean you should buff them aggressively. Keep everything gentle for now.
Step 9: Moisturize Without Overloading Irritated Skin
After removal, apply a bland, fragrance-free moisturizer to the hands and around the nails if your skin tolerates it. Fragrance-free is usually better during a reaction because fragrance can add another possible irritant.
You can browse fragrance-free hand cream for sensitive skin if your usual lotion stings or smells heavily scented. If your skin is open, blistered, or infected-looking, ask a healthcare professional what to use.
Step 10: Do Not Reapply Gel
This is the hardest part for nail lovers, but it matters. Do not immediately reapply gel after a suspected allergic reaction. Your skin needs time to calm down, and repeated exposure may make symptoms worse if you are becoming sensitized.
Skip gel polish, builder gel, Gel X-style systems, acrylics, dip liquids, and nail glue until you know what caused the reaction. Even “sensitive” or HEMA-free gel products may still contain other ingredients that can trigger reactions in some people.
What If You Have Builder Gel, Hard Gel, or Gel Extensions?
Not all gel products remove the same way. Soft gel polish usually soaks off with acetone. Builder gel may or may not soak off, depending on the formula. Hard gel generally does not soak off and must be filed down carefully.
If you have thick builder gel, hard gel, Gel X-style extensions, or sculpted gel nails, be careful. Trying to force removal at home can cause serious nail damage. If acetone is not softening the product, stop and contact a nail professional. If your skin is reacting severely, consider contacting a healthcare professional first so removal does not worsen symptoms.
What If the Reaction Is From Gel X or Nail Glue?
Gel X-style nails and soft gel extensions can involve gel adhesive, full-cover tips, curing, and sometimes extra product near the cuticle. If the gel adhesive touched your skin or was under-cured, allergy symptoms may happen around the nail folds or fingertips.
Nail glue can also irritate or trigger allergy in some people. If you suspect glue is part of the problem, avoid reapplying press-ons with glue until your skin is calm and you have a better idea of what caused the reaction.
For future lower-commitment manicures, some people compare press-on nails with adhesive tabs, but adhesive tabs are not allergy-proof either. Always pay attention to your skin.
What Not to Do During Removal
When your fingers are itchy or swollen, it is easy to get impatient. But these mistakes can make things worse:
- do not peel gel off in sheets
- do not rip off extensions
- do not file deeply into the natural nail
- do not scrape hard with metal tools
- do not cure more gel over the reaction
- do not apply nail glue over irritated skin
- do not soak open, bleeding, or severely blistered skin without medical advice
- do not ignore eyelid, face, or neck reactions
Basically, if the removal method feels violent, it is not the one. We are going for patient and gentle, not chaotic and crunchy.
How to Care for Nails After an Allergic Reaction
After gel removal, your nails and skin may need a break. Keep nails short, clean, and dry. Avoid harsh products, scented lotions, acetone, gel, glue, acrylic, and dip liquids until symptoms improve.
Use mild soap and lukewarm water. Pat hands dry instead of rubbing. Apply a gentle moisturizer if tolerated. If the skin around your nails is intact and not blistered or open, a simple cuticle oil for sensitive skin may help with dryness later in the healing process.
If your skin burns when you apply anything, stop and ask a healthcare professional what is safe. Sometimes less is more during a flare-up.
How Long Should You Avoid Gel After a Reaction?
There is no one-size-fits-all timeline. If you had a true allergic reaction, you may need to avoid the triggering ingredient long-term. Allergic sensitization can come back with future exposure, and reactions may become stronger over time.
If symptoms were mild irritation from acetone, over-filing, or product touching skin, you may be able to return to nail products later with better technique. But if you repeatedly itch, peel, swell, blister, or develop rashes after gel, stop and get professional guidance before trying again.
Should You Try HEMA-Free Gel After a Reaction?
HEMA-free gel polish is popular because HEMA is a commonly discussed gel allergen. But HEMA-free does not mean allergy-proof. Other acrylates, methacrylates, resins, pigments, or additives can still cause reactions.
If you are browsing HEMA-free gel polish for sensitive skin, treat it as a comparison category, not a guaranteed safe fix. If you suspect a real allergy, a dermatologist and patch testing are much more helpful than guessing with new products.
When to See a Dermatologist
See a dermatologist or qualified healthcare professional if symptoms are severe, recurring, spreading, blistering, painful, affecting your eyelids or face, or not improving after removal. You should also get help if you see signs of infection such as pus, heat, increasing redness, odor, or throbbing pain.
A dermatologist may recommend patch testing to identify ingredients you react to. This can be especially important with acrylates and methacrylates because related ingredients can appear in nail products, adhesives, dental materials, and some medical products.
This article is for informational purposes only and is not a diagnosis or treatment plan. When your skin is angry, your eyes are involved, or symptoms are getting worse, please get medical advice.
How to Talk to Your Nail Tech
If your reaction happened after a salon manicure, contact your nail tech politely and ask what products were used. Helpful details include brand names, base coat, color, top coat, builder gel, primer, dehydrator, glue, and lamp type.
You do not need to blame anyone. Reactions can happen even when people are trying their best. But knowing the products can help you and your dermatologist identify possible triggers. Take photos of your symptoms too, especially if the rash changes before your appointment.
How to Prevent Future Gel Reactions
If you are not confirmed allergic and plan to use gel again later, prevention is all about minimizing exposure and improving technique.
- Keep gel off the skin, cuticles, and sidewalls.
- Clean up every mistake before curing.
- Use thin coats instead of thick layers.
- Use a compatible UV or LED lamp.
- Follow cure times exactly.
- Do not mix random gel systems if you are unsure about curing.
- Remove gel gently instead of peeling it off.
- Stop immediately if itching, swelling, burning, or rash returns.
A small gel nail cleanup brush can be one of the most useful beginner tools because it helps remove product from the skin before curing.
Safer Manicure Options During Recovery
While your skin calms down, you may want to keep nails bare or use very simple regular polish once the skin is no longer irritated. Avoid gel, acrylic, nail glue, dip liquids, and harsh removers until you know what is safe for you.
You can compare regular nail polish sets if you want color without curing under a lamp. Just remember that regular polish can still irritate some people, so patchy or angry skin should rest first.
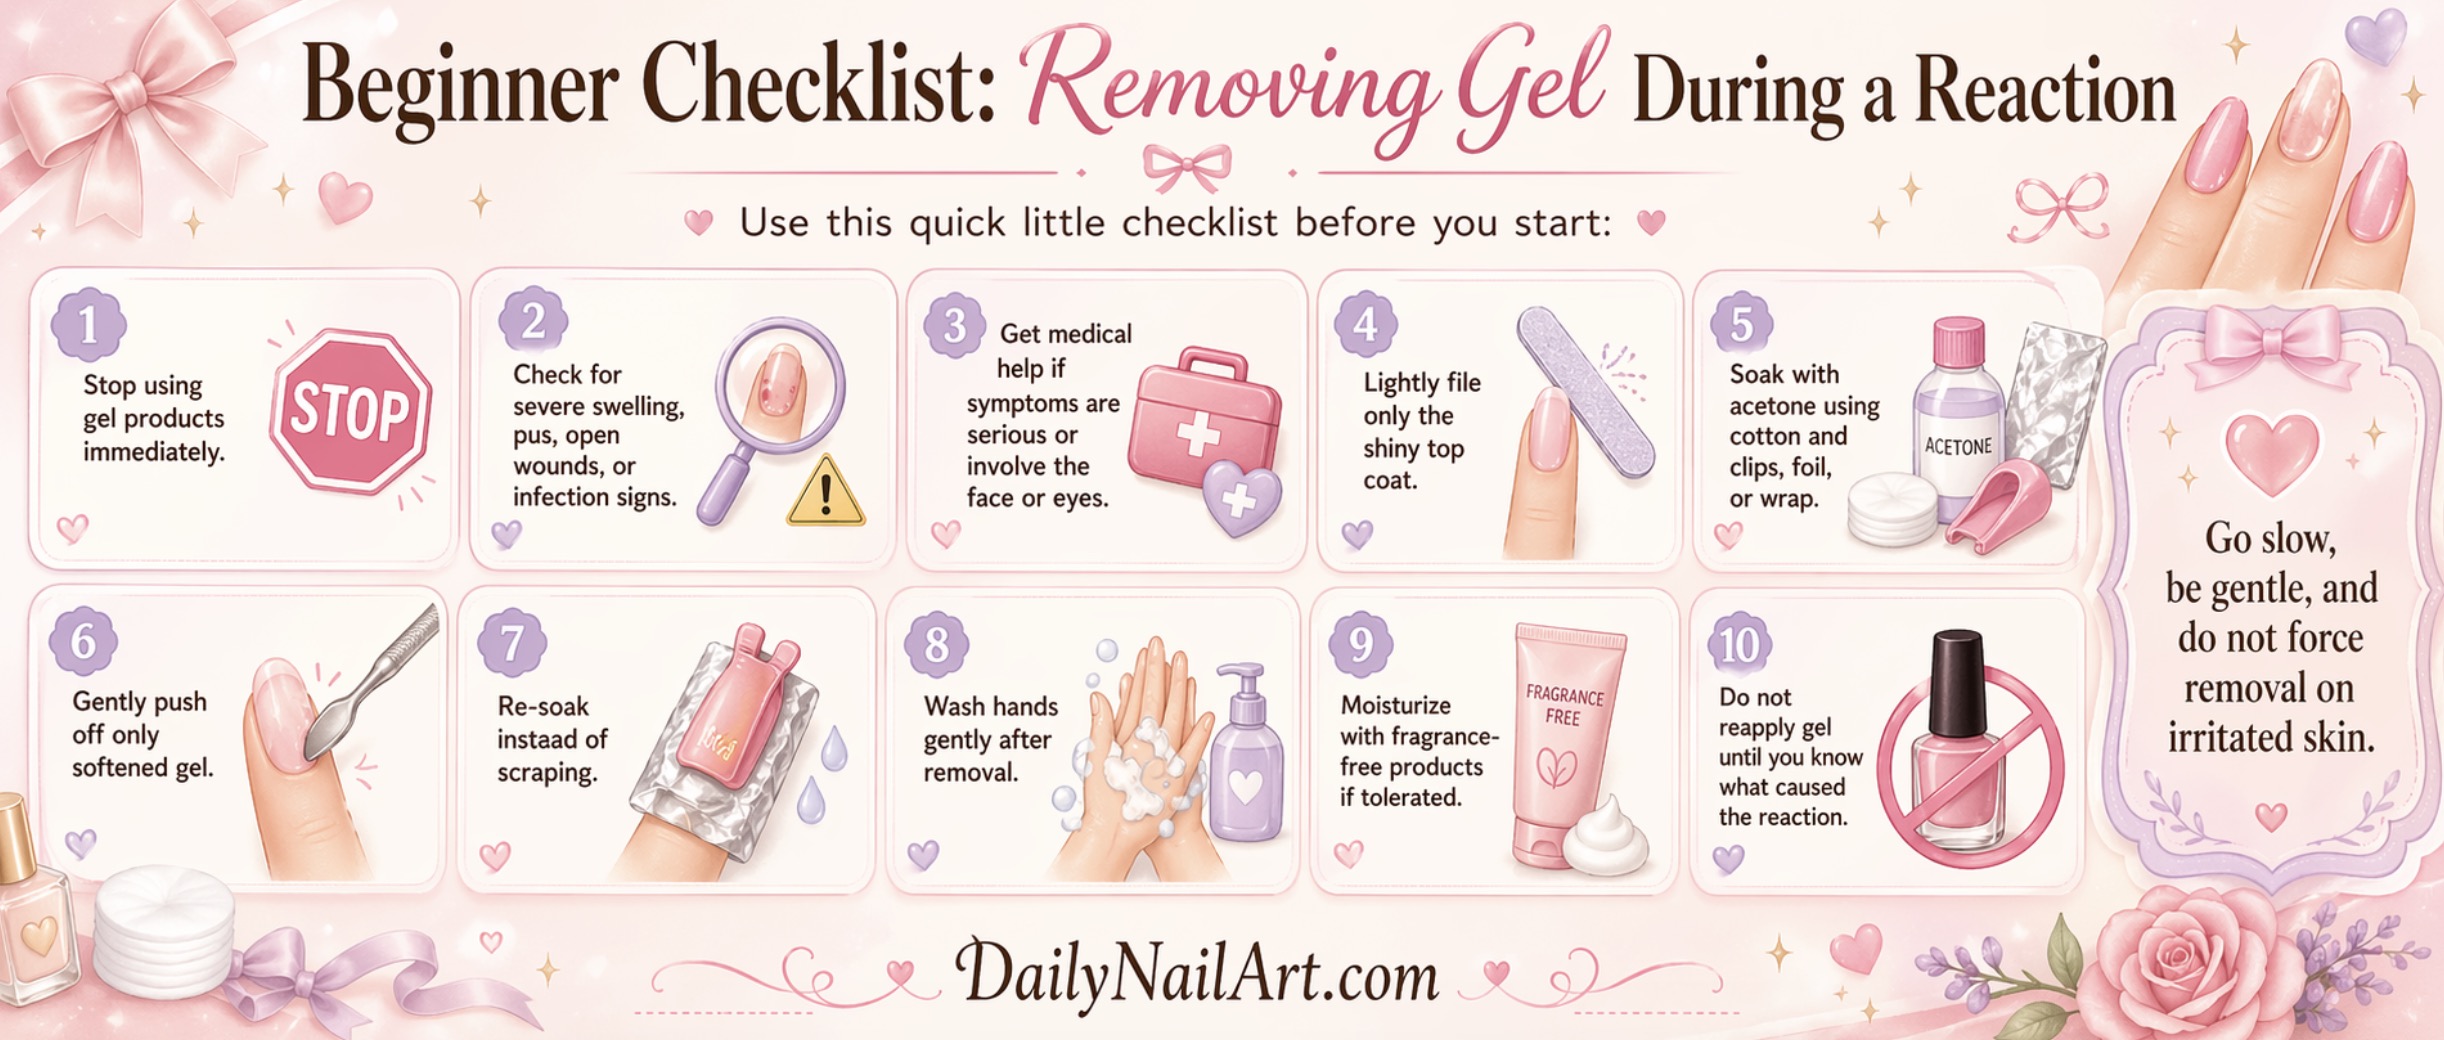
Beginner Checklist: Removing Gel During a Reaction
Use this quick little checklist before you start:
- Stop using gel products immediately.
- Check for severe swelling, pus, open wounds, or infection signs.
- Get medical help if symptoms are serious or involve the face or eyes.
- Lightly file only the shiny top coat.
- Soak with acetone using cotton and clips, foil, or wrap.
- Gently push off only softened gel.
- Re-soak instead of scraping.
- Wash hands gently after removal.
- Moisturize with fragrance-free products if tolerated.
- Do not reapply gel until you know what caused the reaction.
Frequently Asked Questions
Should I remove gel nails if I have an allergic reaction?
Often, stopping exposure to the suspected product is important. However, removal should be gentle. If symptoms are severe, painful, infected-looking, or involve the eyes or face, contact a healthcare professional before attempting removal at home.
Can I peel off gel nails during an allergic reaction?
No. Peeling gel can damage the natural nail and make irritation worse. Soak-off removal is usually gentler for soft gel polish.
Will acetone make my allergic reaction worse?
Acetone can dry and sting irritated skin. If your skin is open, bleeding, severely swollen, or blistered, ask a healthcare professional before soaking.
Can I put new gel on after the reaction calms down?
Not right away. If you had a true allergy, future exposure may trigger another reaction. See a dermatologist or consider patch testing before trying gel again.
Is HEMA-free gel safe after a gel allergy?
Not always. HEMA-free removes one commonly discussed ingredient, but other ingredients can still cause allergic reactions. It is not guaranteed allergy-proof.
When should I see a doctor after a gel nail reaction?
See a healthcare professional if you have severe swelling, blisters, pus, spreading redness, intense pain, eyelid or face swelling, symptoms that keep returning, or symptoms that do not improve after stopping nail products.
Final Thoughts
Removing gel nails during an allergic reaction is all about being gentle, patient, and protective. The goal is to stop exposure without ripping up your natural nails or making irritated skin even angrier. Use careful soak-off methods for soft gel, avoid peeling, and stop if the skin is too painful, swollen, blistered, or infected-looking.
After removal, give your nails a break. Keep your routine simple, use fragrance-free hand care if tolerated, and avoid jumping into another gel set until you know what caused the reaction. If symptoms are severe, recurring, or spreading beyond your hands, talk to a dermatologist.
Your manicure can wait. Your skin gets priority. Healthy, calm fingers are always prettier than forcing a glossy set over a reaction.
Beetles HEMA Free Builder Gel with No Wipe Top Coat Gel Polish and Base Coat Set for Nails Shine Finish and Long Lasting Upgraded Safe Low-Sensitivity Formula Gifts for Women
Love easy Hema Free Builder Gel - Hypoallergenic Strong Base Coat | Long-Lasting Adhesion (30+ Days) for Professional Nails Gift for Women
Beetles Builder Gel Nails Kit HEMA Free & Handheld Nail Lamp, 8 in 1 Clear Natural Nude Building Gel with Base Top Coat, for Thickening Strengthening Shaping Apex, for Beginner DIY Salon at Home Gifts